Mark Menzuber, MTS Market Manager, and Scott Anderson, MTS Senior Applications Engineer discuss non-contacting strain measurement options and trends.
Q. What are non-contacting strain measurement solutions?
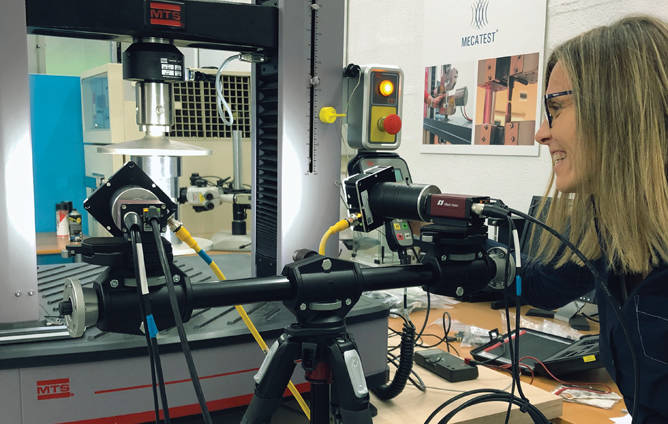
Menzuber: Traditional strain measurement devices, such as strain gages and clip-on extensometers, need to be attached to the specimen, whereas non-contacting methods combine lasers or digital cameras with recording systems and proven image measurement techniques. Together these imaging technologies and measurement techniques can accurately calculate multi-axis displacements, strains, and strain rates for any given test article. Scott, would you like to explain a little more about each type of measurement technology?
Anderson: Sure, Mark. The simplest non-contacting strain solutions (NCSS) are one dimensional (1D), measuring the distance between two points, or marks, on the sample being tested. These 1D solutions are used for point-to-point tension/compression strain measurement and crack opening displacement (COD). The most common technologies used today for this type of NCSS are lasers, optical line scanners and digital image correlation (DIC) software.
Non-contacting extensometers are also used for 2D (X-Y) measurements. These devices measure axial averaging strains, axial transverse strains (for r, n & k values), shear measurements and crack growth.
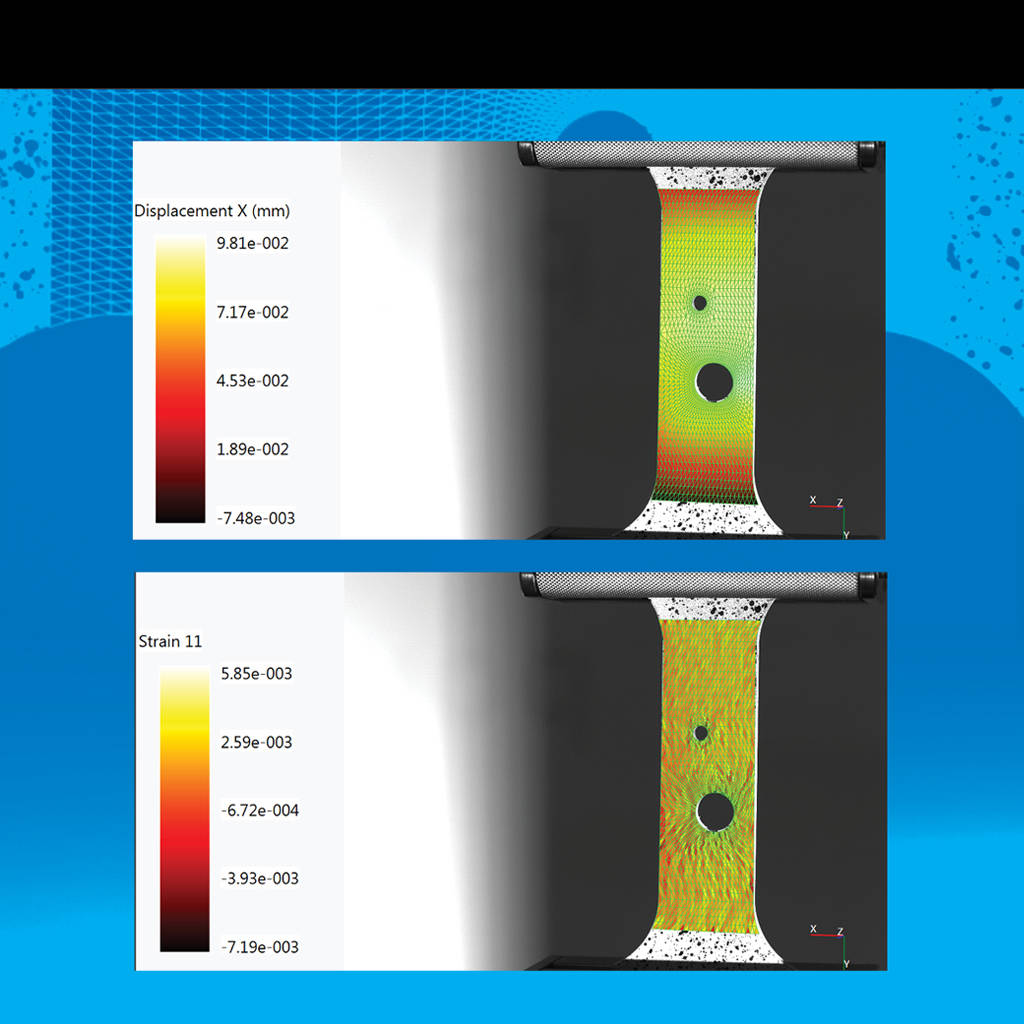
3D (X-Y-Z) strain measurements require a stereoscopic imaging capability with at least 2 sets of optics viewing the same object from a fixed distance apart, to determine the vertical (Y), horizontal (X) as well as out-of-plane (Z) measurements. These 3D technologies allow users to leverage powerful DIC software to measure full-field displacement, strain, and strain rate.
Q. Why are people using non-contacting strain measurement devices?
Menzuber: While there are good reasons to use traditional contacting extensometers, non-contacting strain measurement can often improve data accuracy and save time.
With a non-contacting strain solution, the test data is not compromised by the weight or sharp edges of a contacting device on the sample. This lack of interference is particularly important when working with soft or delicate samples.
Image recording clearly identifies sample failure locations, offering opportunities to review and improve test data, primarily through post-test measurement adjustments. The ability to know precisely how the sample performs means that accurate data can be obtained with fewer tests, saving time. The recorded physical data can also be post-processed and used to create, validate, or even improve existing FEA (finite element analysis) models of selected materials.
So, non-contacting strain measurement solutions can easily capture accurate and comprehensive data; and the need for more detailed data about specimen performance, especially when evaluating new composites and other advanced materials or specimen with unique geometries, is driving demand for non-contacting solutions.
Q. Do you have examples of more comprehensive data leading to greater specimen insights?
Anderson: Typically, quality control (QC) system users want to streamline their testing and improve the number of tests they can get from a test machine and operator in a day. For these applications where the material is homogenous, planar and isotropic, an easy-to-use 1D axial extensometer is an incredible time-saver, as it does not need to be attached to the sample between tests.
For development or research work where the material/sample might not be homogenous, planar and isotropic (such as a composite, or additively manufactured material, or small structure/device) there may be opportunities to improve test lab productivity by capturing failure mechanisms visually. When done by design, the number of required tests can be drastically reduced. By using a 2D (single camera biaxial) or a 3D (stereoscopic system) the user gathers much more information from a single test.
Basic material testing with a 2D single optics system can easily provide axial and transverse strain information to determine Poisson’s Ratio, r, n, & k values. Including a video recording of the test provides substantiating evidence of test results for lab managers and test sponsors.
Q. Is the trend toward non-contacting strain measurement occurring across all markets and applications in materials testing?
Menzuber: Thanks to relatively recent developments in computer processors and high-resolution digital lens technology, non-contacting strain solutions have become easier to use and more affordable, making them a viable choice for all areas of materials testing. Now lab managers can take advantage of non-contacting strain measurement technologies to improve data accuracy and lab productivity. There are a wide range of solutions available today, so they can find options that best suit their unique set of testing challenges.
Q. What is unique about MTS’ approach to non-contacting strain solutions?
Menzuber: We recognize that selecting the best non-contacting strain solution for a given lab depends on numerous factors, including applications, materials and test operator expertise level. Given these variables, the best solution often requires systems integration expertise. So, the MTS responsibility to our customers is to understand the pros and cons of all NCSS technologies, to focus our initial conversations on their specific application needs, and then recommend the optimal solution for their comprehensive lab requirements. Not until we understand the complete set of objectives, do we make a NCSS recommendation. Sometimes that proposal will include an MTS NCSS product, but oftentimes we’ll leverage one of our many NCSS OEM relationships and collaborate on an integrated solution that will best serve that customer’s needs.
Q. Wait, MTS can offer any NCSS capability in the market?
Anderson: Yes, we work closely with all the leading non-contacting solution providers to offer the best solution for each customer’s specific needs. We know how to incorporate measurement devices from Correlated Solutions, GOM, Trilion, Match ID and many others with our test systems to provide an integrated, seamless testing experience. Developing our integration expertise with a variety of non-contacting solutions is how we believe we can best help our customers.
Q. How does MTS help to provide an integrated test solution?
Menzuber: We have put together a core team of applications engineers and systems integration experts who keep up to date with non-contacting strain measurement technologies. This team considers everything from system compatibility to test data integration and synchronization. Because of our large and growing knowledge base in NCSS products and applications, we can listen to a customer’s testing and data analysis requirements, reflect on a variety of solutions available in the market, and help match the appropriate solution to the specific application needs.
Q. What about for the needs of the QA/QC tester? Aren’t non-contacting solutions excessive for these simpler tests?
Anderson: Their complexity when compared to contacting strain measurement devices has been one of the drawbacks of using non-contacting solutions for QA/QC testing. We now have solutions that are remarkably easy to setup and use for monotonic or axial fatigue testing. These solutions require very little operator intervention between tests, making them ideal for the high throughput environments found in QA/QC testing.
Q. What about the materials researcher? What solutions are there for those who are doing R&D?
Anderson: For the materials researcher, accurate data integration, synchronization and analysis are critical baseline requirements. This is where MTS works closely with the 3D solution providers to help our customers with their needs for digital image correlation, full field strain measurement, video replay, post-test analytics and finite element analysis (FEA) model comparison. We work with experts in this field to help make sure the customer’s entire test system setup delivers the results they need.

